
I promised to show how I made this towel rack for our master bathroom makeover and I'm back to show just how I put this thing together.

First the supplies:
-Scrap piece of lumber. I used a piece of 2x8 cut down to about 22" long.
-Mod Podge
-Primer (if using bare wood)
-Paint
-Hooks (Mine were less than $4 each at Lowe's)
-Graphic to add to center
The graphic I chose I found on The Graphic Fairy. If you have not been the Graphic Fairy blog you must see it. You could spend hours looking through all the wonderful graphics and crafts she has posted.
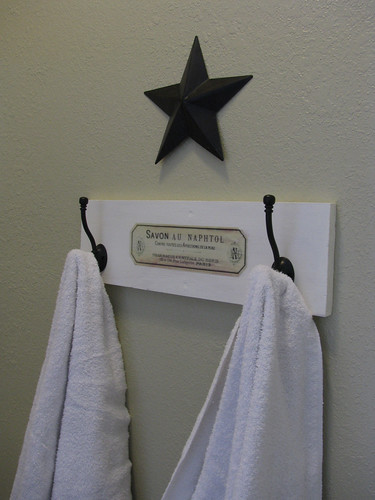
My graphic is from an old French soap label and says "Natural Soap, against all diseases of the skin." I had to use an online translator for that. My French teacher would be so disappointed. I liked the antique look, the shape and size of the label were perfect, and everything just looks more elegant when written in French.
So first I primed and painted the front and sides of the board. I didn't bother with the back. Then I copied the graphic into Word and blew it up to the size I wanted. I printed it out on regular printer paper. I used my paper trimmer and scissors to cut out the shape and centered it over the board.

Next it was time to break out the Mod Podge. I hadn't used Mod Podge in probably 10 years or so. I chose the matte finish because I didn't really want it to be shiny. I used some Mod Podge to adhere the label and then applied several coats over the label and the entire board. Some of the ink smeared a bit, but I figured it just gave it more character. I wasn't going for perfection here, but something aged and worn looking. Or at least I'll pretend that's what I was going for.
Once everything dried it was time to attach the hooks. I had to be careful attaching the screws with the hooks because they were longer than the thickness of the board and I didn't want the screws to go all the way through yet. So I put the hooks on most of the way without fully pushing the screws through all the way until it was mounted on the wall.

I used spackle and paint to cover over the screws. Wood putty would probably have been better because of the size of the holes, but my wood filler was all dried up in the tube. I do have an idea to cover up the screw holes though. I will post about that when I find time to complete that little project.


this is adorable and thanks for the link for making the label... i am a huge fan of the fairy BUT can you believe i never thought to decoupage with the graphics!
ReplyDeleteI adore it!! I love the vintage look of it, the practicality, and the star you hung above :)
ReplyDeleteThanks for the tutorial, this project is so cute!
ReplyDelete