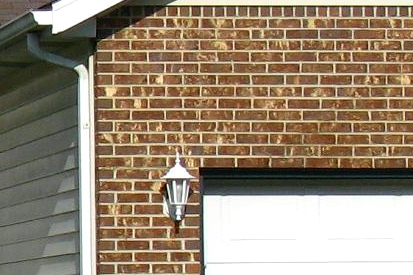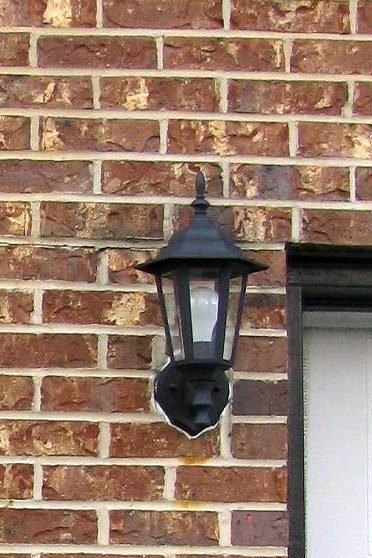
When I posted about our outside house makeover here and here, I left out much info. on how I revamped our outside lights on each side of the garage. They were probably gold originally and then had been painted white somewhere along the way. So here's what I started with.(And yes it's a bad photo, sorry!)

I decided when we painted the shutters and garage trim black that the lights needed a makeover too. So it was time to break out the spray paint again. However, hubby did not want to take the lights down and have to worry about getting them back on right and making sure they didn't leak. Therefore, I decided to spray paint them the lazy way and leave the lights still mounted to the house while I painted them. Here's how I did it.
1. Remove top of light and glass inserts. This was pretty easy, just a few screws holding the top in place and hubby carefully lifted out the glass panels.
2. Remove lightbulb and tape of inside of light where the light goes. Spray paint and electricity don't mix so well so keep paint out of there.
3. Use newspaper, plastic bags, whatever you have on hand to cover the side of the house around the light. Spray paint on light good, spray paint all over the house, bad. I used a thin plastic drop cloth on the first light, but I found newspaper worked much better. Use painters tape, masking tape, packing tape, again whatever you have on hand to tape the paper/plastic to the house around the light. Carefully tear paper and use tape to mark off around the base of the light. This can be tricky because of all the curves.
(Imagine picture of light surrounded by newspaper and tape here. I should have taken more photos of the process, sorry, I'm trying to be better about that!)
4. Stand carefully on ladder if lights are up high and get going with the spraying. I used black satin Rustoleum paint. Put top cover of light(that was removed) on cardboard or dropcloth and paint that also using light even coats.
5. After a couple coats of paint let everything dry and remove plastic and newspaper from house so neighbors will stop staring at you. Reinsert lightbulb and top of light. Stand back and admire your work.

I know this won't work for all types of lights and if you to remove the light that's fine too. But if you have these blah builder grade lights, you can change the color and do it the lazy way like me.


What a great transformation! Well done~
ReplyDeleteAwesome! I love it! Great transformation!
ReplyDeleteI love it, this would work great for our blah builder lights...they've been on my list for a long time!
ReplyDeleteThanks for stopping by!
That looks great--gives it more "ooomph"!
ReplyDeleteI had to laugh at you painting the lights while they were still on the house. You are so clever. And just my kind of friend ... all over the shortcuts :) Nice job. They look great.
ReplyDeleteThe black really pops out against the brick. It looks great.
ReplyDeleteI know this is an old post and you haven't been blogging recently, but I thought I'd comment on this. First, it's actually REALLY easy to remove this kind of light and then reinstall. But, I am amazed at the great job you did while they were up on the house! And I agree that black is the right way to go... I don't think this style of light ever looks good white.
ReplyDeleteI have similar builder-grade lights, and our house is white with black shutters... very traditional, and in New England. Yet the lights, which in this style would originally have been iron (and therefore should be black) were white. WHY would the builder have put white lights on a white house? Since these lights are not very expensive, I bought new black ones in the exact same style, and replaced the white ones flanking the front door. But then, I took the white ones apart and sprayed them with black satin spray paint. They look AMAZINGLY similar to the new ones which have a factory-applied black coating (as do yours.) I used the newly-painted ones to replace some incredibly cheapo jar lights by the side door and basement door. Now every door has matching black light fixtures and you'd be hard-pressed to figure out which ones had factory-applied coatings and which had been spray-painted. No, this wouldn't work for more expensive light fixtures (well it would probably be fine, but not look the same as a factory-applied coating) but it DOES work even on lights with a powder coat finish. The spray paint applied over an existing powder coat finish takes on the powder coat appearance. I've also used black satin spray paint on black metal patio furniture, with great results.